Showing posts with label Blogger Hacks. Show all posts

Internet Explorer 6 Fix for Blogger Templates

When your site gets a visitor and finds that one of your sidebar has been pushed below the posts, he’ll consider your site of not a decent quality and you might lose a regular reader

The ready made templates which are available for Bloggers are from the side of some world class designers but when a blogger places an image, video etc. in the middle of the post and the width of the images/video is more than that space provided, in some versions of Web browser, the sidebar tends to drop ,ie, it slips down blog posts this is also known as float drops.

I had a similar problem when one of my friends said that the left sidebar is dropping for my Minima three column template in some old versions of Internet Explorer. My site is loaded with a lot of stuff and maybe in some web browser my sidebar falls. My site in short was looking a piece of crap without one sidebar.

A normal css definition for a sidebar looks like

#sidebar-wrapper

{

width: 240px;

float: right;

word-wrap: break-word; /* fix for long text breaking sidebar float in IE */

overflow: hidden; /* fix for long non-text content breaking IE sidebar float */

}


word-wrap:break-word property for fixing long floating text works only in Internet Explorer

Too make your sidebar fixed in one location, add these three CSS properties to the sidebar-wrapper property of your template

#sidebar-wrapper

{

positon:absolute;

magin-top:0px;

margin-left:0px;

}


So now the code looks like this

#sidebar-wrapper

{

positon:absolute;

magin-top:1px;

margin-left:1px;

width: 240px;

float: right;

word-wrap: break-word; /* fix for long text breaking sidebar float in IE */

overflow: hidden; /* fix for long non-text content breaking IE sidebar float */

}

This confirms to the Web Browser that the sidebar has to remain fixed at one place only in all versions of the Web Browser. The Sidebar will remain static and should not be affected by any long floating image/text/video.

[Read the rest of this entry...]

Add Feeds to Your Labels in Blogger

Today i will show you how to add Feeds to labels in Blogger.It is very simple hack and you can do it very easily.As you see the pic in the right side,you notice the feeds icons in the left of each labels.This helps for a reader to subscribe for a single category.So,follow the following easy steps and hey...Dont forget to digg or bookmark this post as other can also know;)

1. Go to HTML tab in your template layout.
2. Backup your template.
3. Tick the box of "Expand the widgets".
4. Find this code (shown in Red) in your template:

<b:widget id='Label1' locked='false' title='Labels' type='Label'>
<b:includable id='main'>
<b:if cond='data:title'>
<h2><data:title/></h2>
</b:if>
<div class='widget-content'>
<ul>
<b:loop values='data:labels' var='label'>
<li>
<a expr:href='"http://beta.blogger.com/feeds/YOURBLOGID/posts/full/-/" + data:label.name'><img src='http://img304.imageshack.us/img304/3518/rect18st2.png'/></a>
<b:if cond='data:blog.url == data:label.url'>
<data:label.name/>
<b:else/>
<a expr:href='data:label.url'><data:label.name/></a>
</b:if>
(<data:label.count/>)
</li>
</b:loop>
</ul>

<b:include name='quickedit'/>
</div>
</b:includable>
</b:widget>

5. Add the above code colored in Blue in the specified place.
6. Change YOURBLOGID (Shown in bold) to Your own Blog ID.
7. Save your template and Its Done.

What is Blog ID?Just visit the Blog ID link in step 6 and follow instructions to find your blog ID.

Note:You must have the label widget in your template.
If you have any Problems,I am Here.
If you like this trick,then please link back to my blog:)
[Thanks Purple Moggy for the code]
[Read the rest of this entry...]

Swap Posts Titles and Blog Titles in Blogger Beta

Yes, Now you can change the Title of the blogposts on individual post-view. You might have seen that I've changed the Title of my homepage to "Blogger Templates|3 Column Templates|Blogger Widgets|Blogger Hacks." This trick can help in boosting your search engine rankings.
By default, your Blogger's title on the top left displays your blog title, and if it's in the items page, it'll include your post title as well.eg, My Blog:Change the blog title for blogposts. By copying the coding from below, you can change the default behavior of the title tag.

  • Step 1-Goto Blogger Dashboard>>Layout>>Edit Html
  • Step 2-Backup your template
  • Step 3-Follow the instructions below

Find this code in your XML template{in header}

<title><data:blog.pagetitle/></title>

Now replace it with

<!-- Start Widget-based: Changing the Blogger Title Tag -->
<b:if cond='data:blog.pageType == "item"'>
<b:section id='titleTag'>
<b:widget id='Blog2' locked='false' title='Blog Posts' type='Blog'>
<b:includable id='comments' var='post'/>
<b:includable id='postQuickEdit' var='post'/>
<b:includable id='main' var='top'><title><b:loop values='data:posts' var='post'><b:include data='post' name='post'/></b:loop> ~ <data:blog.title/></title></b:includable>
<b:includable id='backlinkDeleteIcon' var='backlink'/>
<b:includable id='feedLinksBody' var='links'/>
<b:includable id='backlinks' var='post'/>
<b:includable id='status-message'/>
<b:includable id='feedLinks'/>
<b:includable id='nextprev'/>
<b:includable id='commentDeleteIcon' var='comment'/>
<b:includable id='post' var='post'><data:post.title/></b:includable>
</b:widget>
</b:section>
<b:else/>
<title><data:blog.pageTitle/></title>
</b:if>
<!-- End Widget-based: Changing the Blogger Title Tag -->

Further more you can add a very good keyword in homepage's title by just adding Keyword + Blog Title by finding this line in the above code{3rd last}-

<b:else/>
<title><data:blog.pageTitle/></title>
</b:if>

and adding keyword here

<b:else/>
<title> <data:blog.pageTitle/>Keyword</title>
</b:if>

Be creative in writing Keyword, it will surely help your blog grow and also for search engine optimization.
I would like to thank Webtalks for sharing such a great trick with us.

[Read the rest of this entry...]

How to Add Email Link Below the Posts in Blogger

You can put your email link below your posts but it will be picked up by spam bots and then your inbox will soon be full of thousands of spam mails. It will be better to follow this method of putting it.......

First you will have to create an image out of your email link. For this go to :

Email Generator

OR

http://services.nexodyne.com/email

Follow the steps to make an image out of your email and then download it to your PC. Create an account at a freehost like Googlepages and upload the image there. Copy down the link of the uploaded image.


Login to Blogger Dasbhoard. Click on layouts for the blog where you want to add the link. Click on Edit Html tab at the top. First backup the template by clicking on Download Full Template link. Then put a check in Expanded widgets Template box and scroll down in Edit Template text box till you come to this line in Blog Posts widget :

<p class='post-footer-line post-footer-line-1'>

Paste the line below just under the code above :

<img src="URL OF UPLOADED EMAIL IMAGE" alt="my email" />

Replace the CAPS with the link of your uploaded image. Preview and save Template.

CLICKABLE EMAIL LINK


To make a clickable image link paste this code instead at the same position :

<a href="mailto:xyz@gmail.com?subject=Hello%20again"><img src="URL OF UPLOADED EMAIL IMAGE" alt="my email" /></a>

Instead of xyz@gmail.com put your own address. This method carries the risk of the address being harvested by spam bots. Save Template. Now clicking on the image will open the Compose Mail window with the address already filled in and the subject title as Hello Again.
[Read the rest of this entry...]

How to Create Expandable Posts Summaries in Blogger

Expandable Post Summaries is the method by which each blog post consists of a short paragraph of introduction followed by a 'Read More' link. This enables the reader to get a small introduction to each post on the main page. He can then click the Read More link if he gets sufficiently interested........

Many bloggers have reported confusion when they tried to follow the instructions on the official blogger help page for this hence I have tried to put the help in more easy to follow terms here. There are basically three steps to follow if you want to implement expandable post summaries in the new layouts template.

CONDITIONAL CSS


The first step is to put the code for the conditional css. This changes how posts display on different pages. To do this login to Dashboard and click on Layout for your blog. Then click on Edit Html and first backup your template by using the Download Full Template link. Then scroll down till you come to </head> tag and add the following code immediately above it :

<style>
<b:if cond='data:blog.pageType == "item"'>
span.fullpost {display:inline;}
<b:else/>
span.fullpost {display:none;}
</b:if>
</style>


Save Template. IMPORTANT NOTE in the layouts template there is a ]]></b:skin> tag just above the </head> tag. Add the above code so that it lies between these two tags. What we did here was to define a class called "fullpost" that will appear only on post pages (permalinks).

"READ MORE" LINKS


The second step is to add the Read More links which will appear after the paragraph summaries. To do this put a check in the Expand Widgets Template checkbox at the top of the Edit Template text box.
NOTE : If you do not put a check in Expand widgets template checkbox at the top of the TEMPLATE CODE BOX you will not see this code.
This is in the Edit Html subtab of Template tab. Then scroll down in the code till you come to the Blog Posts Widget code where locate this line of code :

<data:post.body/>

Add the code below immediately after the above code :

<b:if cond='data:blog.pageType != "item"'>
<a expr:href='data:post.url' target='_blank'>Read more!</a>
</b:if>


Save Template. This link will only appear on the main page and archive pages, and it will redirect your reader to the post page containing the full text of your post.
IMPORTANT NOTE : Do not use any other code or it will give error.

You can also add your Post Title at the end of the Read More link so that it will read "Read More on "My Best Post"!"

A Reader wanted to increase the font size of the Read More! link. To do this add this code instead of the one above :

<b:if cond='data:blog.pageType != "item"'>
<span ><a expr:href='data:post.url' target='_blank'><font size="120" color="red">Read more!</font></a></span>
</b:if>


Increase or decrease the figure 120 as you want it and then save the template. To make the font bold use this code instead :

<b:if cond='data:blog.pageType != "item"'>
<span style="font-weight:bold;"><a expr:href='data:post.url' target='_blank'>Read more!</a></span>
</b:if>

Save Template. To do both use this code :

<b:if cond='data:blog.pageType != "item"'>
<span style="font-weight:bold;"><span ><a expr:href='data:post.url' target='_blank'>Read more!</a></span></span>
</b:if>


Save Template.

POST MODIFICATIONS


The last step is to modify the post template so that each post when created will show you where to place your summary paragraph and where to place the rest of the post. To do this go to Settings------>Formatting and scroll down to the end of the page to the box for the Post Template. Copy and Paste the following lines there :

Here is the beginning of my post. <span class="fullpost">And here is the rest of it.</span>

Save Settings. When you click on Create Post and then Edit Html tab of Post Editor you will see the following (Click Image for larger view) :


Replace the line "Here is the beginning of my post." (Type your summary here) with your summary paragraph. Then replace the line "And here is the rest of it." (Type rest of the post here.) with the rest of your post. Do not delete the other lines <span class="fullpost"> and </span>. Also add your summary paragraph above both the lines and your rest of the post between the lines. Then click Publish to publish post.

CREATING YOUR POSTS


Login to Blogger.com and click on +New Post link on Dashboard. The Post Editor will come up. Click on Edit Html tab in top right frame of Post Editor. This is what you should see (The colors are mine) :

Type your summary here
<span class="fullpost">
Type rest of the post here
</span>

If you want to show a photo or any text on the summary post on the Main Page put it instead of the red text line.

If you want photo to show in the full post on the Post Page put it instead of the GREEN text.

Before publishing make sure that the two span (code) lines are present and the
line is at the bottom and the span=readmore line in between your summary post and the second half of the post.

Then only click on Publish button.

PLEASE NOTE


1. The hack will not apply retrospectively. That is to say after you add the code you will have to edit your past posts so that they display in summary fashion on the Main Page of the blog.


2. The hack applies only to posts on the Main Page. Once a post having the hack moves off the Main Page it does not display in this fashion. This is a Main Page Hack.

ADVANTAGES OF THIS METHOD


The advantages of this method is you get a link to your posts below your summary paragraph which gets an additional link in the search engines indexing. Also you do not have to rely on any external Javascript. The third advantage is that the Read More link opens into a new page leaving your main page still open in viewer's browser.
[Read the rest of this entry...]

How to Fix bX-xu1zoq Error In Blogger

In the Page Elements subtab of Template tab when trying to rearrange your Page Elements or Layout using the drag-and-drop interface you may get a bX-xu1zoq error code as shown below :


Here is a workaround for this :

Switch to Edit Html subtab of Template tab and scroll down to see the code for the widget. It will look like this :

<b:widget id='Label2' locked='false' title='Labels' type='Label'/>

The name, title and widget id may be different but in the unexpanded widget template the whole widget is represented by the above one line. Use Edit---->Cut to remove and copy the widget line to the clipboard. Then use Edit---->Paste to paste it lower down in the same section or to another section.

Remember to paste it within a section which is shown by this code :

<b:section class='sidebar' id='sidebar' preferred='yes'>

PASTE WIDGET CODE LINE HERE

</b:section>

Save Template.

UPDATE : This method also works for ERROR : bX-o3wmwc which you may get when trying to rearrange page elements on the Layout Page.
[Read the rest of this entry...]

Related Posts Widget for Blogger

This widget or hack call it how you like is often requested by fellow bloggers.

Here is the tutorial how to install related posts based on labels underneath your blog posts.

First of all you must know that it won`˙t work if your labels use any reserved url characters.

Go to templates edit html and click on expand widget templates and copy the whole code inside a plain text editor like notepad. You might consider backing up your template if something runs wrong.

Now paste the following in the page header :


<script type="text/javascript">
//<![CDATA[
var relatedTitles = new Array();
var relatedTitlesNum = 0;
var relatedUrls = new Array();
function related_results_labels(json) {
for (var i = 0; i < json.feed.entry.length; i++) {
var entry = json.feed.entry[i];
relatedTitles[relatedTitlesNum] = entry.title.$t;
for (var k = 0; k < entry.link.length; k++) {
if (entry.link[k].rel == 'alternate') {
relatedUrls[relatedTitlesNum] = entry.link[k].href;
relatedTitlesNum++;
break;
}
}
}
}
function removeRelatedDuplicates() {
var tmp = new Array(0);
var tmp2 = new Array(0);
for(var i = 0; i < relatedUrls.length; i++) {
if(!contains(tmp, relatedUrls[i])) {
tmp.length += 1;
tmp[tmp.length - 1] = relatedUrls[i];
tmp2.length += 1;
tmp2[tmp2.length - 1] = relatedTitles[i];
}
}
relatedTitles = tmp2;
relatedUrls = tmp;
}
function contains(a, e) {
for(var j = 0; j < a.length; j++) if (a[j]==e) return true;
return false;
}
function printRelatedLabels() {
var r = Math.floor((relatedTitles.length - 1) * Math.random());
var i = 0;
document.write('<ul>');
while (i < relatedTitles.length && i < 20) {
document.write('<li><a href="' + relatedUrls[r] + '">' + relatedTitles[r] + '</a></li>');
if (r < relatedTitles.length - 1) {
r++;
} else {
r = 0;
}
i++;
}
document.write('</ul>');
}
//]]>
</script>

Scroll down to the blog1 widget, and find the following:

<b:if cond='data:post.labels'>
<data:postLabelsLabel/>
<b:loop values='data:post.labels' var='label'>
<a expr:href='data:label.url' rel='tag'><data:label.name/></a><b:if cond='data:label.isLast != "true"'>,</b:if>
</b:loop>
</b:if>

and change it to :

<b:if cond='data:post.labels'>
<data:postLabelsLabel/>
<b:loop values='data:post.labels' var='label'>
<a expr:href='data:label.url' rel='tag'><data:label.name/></a><b:if cond='data:label.isLast != "true"'>,</b:if>
<b:if cond='data:blog.pageType == "item"'>
<script expr:src='"/feeds/posts/default/-/" + data:label.name + "?alt=json-in-script&amp;callback=related_results_labels&amp;max-results=10"' type='text/javascript'/>
</b:if>
</b:loop>
</b:if>

Save the code back to your template html and go to page elements and add a new HTML/Javascript widget underneath the main blog posts widget with this code :

<script type="text/javascript">
removeRelatedDuplicates();
printRelatedLabels();
</script>

Now go back to Template -> Edit HTML, check the check box to expand the template code, and find the HTML/Javascript widget you just added. It'll look something like the following. Add the lines in bold:

<b:widget id='HTML13' locked='false' title='Related Posts' type='HTML'>
<b:includable id='main'>
<b:if cond='data:blog.pageType == "item"'>
<!-- only display title if it's non-empty -->
<b:if cond='data:title != ""'>
<h2 class='title'><data:title/></h2>
</b:if>
<div class='widget-content'>
<data:content/>
</div>

<b:include name='quickedit'/>
</b:if>
</b:includable>
</b:widget>

There's a few numbers you can tweak to show more or less related posts. In the first code box there is a part that says i < results="10.">
[Read the rest of this entry...]

How to Add an Icon/Image to Blog Posts Titles

Would you like to add a small graphic or icon to your post titles? Some members of Google Groups asked for this feature and here it is......

1. CREATE A GRAPHIC

First step is to create a graphic either in an image editor or in an online image generator such as cooltext.com. Save it to your hard disk and upload it to a freehost. Then copy down its link/URL.

2. CREATING THE IMAGE CODE


The image code is :

<img src="LINK OF YOUR IMAGE" style="border-width:0px" />

Replace the CAPS with the link of your image obtained in step 1.

3. MODIFYING THE TEMPLATE

Login to the Dashboard and click on Layout for the blog you wish to modify. Then click the Edit Html subtab of Template tab. First backup the template. Put a check in Expand Widgets Template box at the top of the template text box.


Scroll down till you come to the Blog Posts widget code. Locate this code :

<b:includable id='post' var='post'>
<div class='post hentry'>
<a expr:name='data:post.id'/>
<b:if cond='data:post.title'>
<h3 class='post-title entry-title'>
<b:if cond='data:post.link'>
<a expr:href='data:post.link'><data:post.title/></a>
<b:else/>
<b:if cond='data:post.url'>


Paste the code you created in Step2 immediately after the last line in the above code. Preview and Save Template. See picture below of the icon next to my post title

If you want it to appear after the title paste the image code after this subsequent line of code :

<data:post.title/>

Preview and save Template.
[Read the rest of this entry...]

How to Add Adsense to Beta Blogger Posts

To add Adsense Ads. to beta blogs.............

FIRST BACKUP YOUR TEMPLATE.

Then login to your Adsense account and click on Adsense Setup. Click on type of Ad. you want to setup - Content, Link unit, Search unit or Referrals.
MOST IMPORTANT LINK IN YOUR TEMPLATE SETTINGS is Download Full Template on Edit Html subtab of Template Tab.
At present you are allowed to add three Content Ads., One Link Unit, two Search units and four different Referal units per page. You should try to add Ads. so that most of them appear 'above the fold'. This is the amount of web page visible to the viewer on loading the page without having to scroll down. The best place for the Link unit is in the header as a single line containing 4-5 ad units. The right hand sidebar can hold one 'skyscraper' content unit with another in the left sidebar. This is if you have a three column template structure like this web page. The one big rectangle of content unit can go above the posts in the main column. You can add the search unit either in the posts column or in the sidebar. The referrals units can go in the sidebars at the bottom.

Follow the procedure till you come to the code for pasting in your site. Then login to Dashboard click on Layout under the name of your blog. Click on 'Add Page Element' in the sidebar and choose Html/ javascript option in the popup window. Copy the code for the Ad. from Adsense setup page and paste it into the Content area. Save changes.

To add the code in the main column of your blog. Click on 'Edit Html' Tab to open the Edit Template page. Let Expand widget templates box be unchecked. In Edit template field scroll down till you come to the code for the main column which is :

<div id="main-wrapper">
<b:section class="main" id="main" maxwidgets="1" showaddelement="no">
<b:widget id="Blog1" locked="false" title="Blog Posts" type="Blog">
</b:widget>
</b:section></div>

In the above code change maxwidgets="1" to maxwidgets="2"
Also change showaddelement="no" to showaddelement="yes"
Save Template.


Now click Page Elements tab. The Add and arrange Page Elements page opens.
Here you can now see that Blog posts section has a Add Element link. Click it to open the choices page. Choose Html/Javascript option.
CHOOSING HTML/JAVASCRIPT OPTION ENABLES YOU TO ADD CHANNEL INFO ALSO.
Copy and paste the Adsense code into the Content field. Save changes. This will place the Ad. on top of your posts. To place it below your posts go to Page Elements view and in the Blog Posts Section click and drag the Ad. to below the posts. To place one more Ad above the posts change maxwidgets="2" to maxwidgets="3" and repeat the above process. Refresh Cache. View Blog. Enjoy.


IMPORTANT ; Many readers have asked for a hack similar to Classic Blogger in which we could add Adsense Ads. within the body of the posts. louiss lim has a hack for this here. However this is done by altering part of the Adsense Ad. code which is against the TOS, so he has submitted it to Adsense for approval. Also it seems that only text Ads. can be added this way.
[Read the rest of this entry...]

How to Create Thumbnail images-Blogger Hack

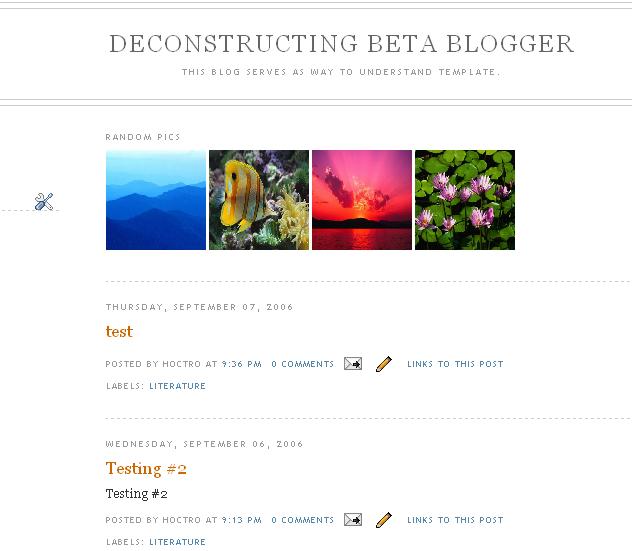
In a nutshell, the hack takes advantage of the Page Element's Link List and turns it into a Thumbnail Picture List element. As you might know, the link list allows the page owner to quickly add a bunch of urls for quick links to other interesting sites. My hack takes advantage of the GUI interface to quickly add/erase/arrange these links but pushes it further to upload image addresses instead.

Here are the steps to setup this hack. You are also required to know some HTML & CSS to further enhance this hack to make it your own unique version of it.

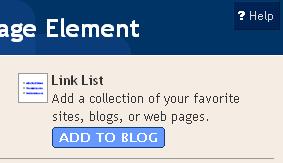
First, go to Template->Add Elements, then select sidebar's Add Page Elements. Select Link List option at top right corner:


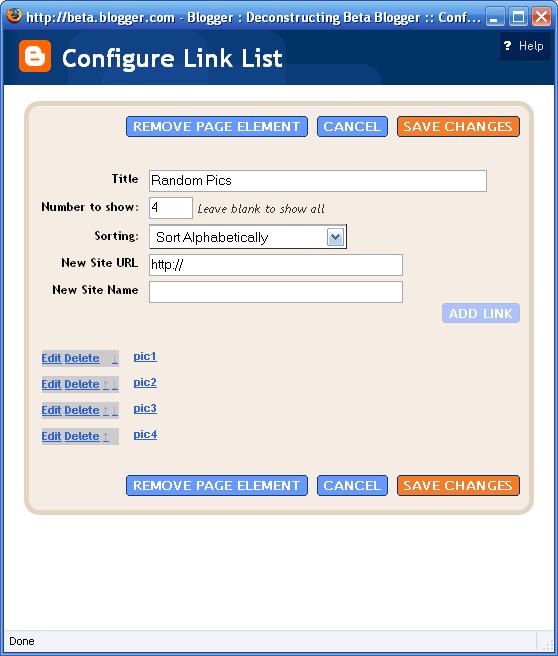
Next, add some sample pictures:


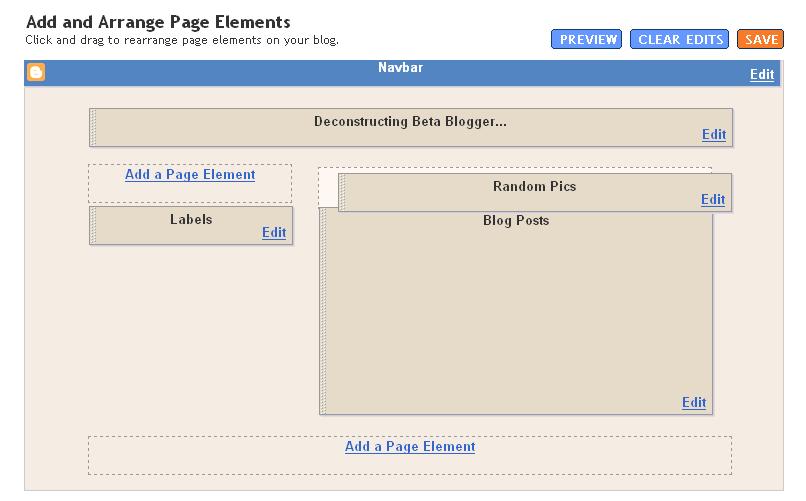
Then, drag-n-drop the newly created link-list from sidebar to post body area. (You can always move it back later.)


Go to Template->Edit HTML. Make sure to check the Expand Widget Template check box. Then look for the LinkList1 widget. It should be in front of all the other widgets, and right after the CSS portion of the code.


Then replace that widget with this one, make sure they have the same name (LinkList1):

<b:widget id='LinkList1' locked='false' title='Random Pics' type='LinkList'>
<b:includable id='main'>
<b:if cond='data:title'><h2><data:title/></h2></b:if>
<div class='widget-content'>
<div class='hoctro_spacer'>
<b:loop values='data:links' var='link'>
<a expr:href='data:link.target' onblur='try {parent.deselectBloggerImageGracefully();} catch(e) {}'><img alt='' border='0'
expr:src='data:link.target' height='100' style='display:inline; margin:0px auto 10px; ;cursor:pointer;' width='100'/></a>
</b:loop>
</div>
<b:include name='quickedit'/>
</div>
</b:includable>
</b:widget>

As you can see, I use the same code that Blogger provides when it successfully upload an image as a mean to show the image itself. You can use whatever it best fits your purpose.

<a expr:href='data:link.target'
onblur='try {parent.deselectBloggerImageGracefully();} catch(e) {}'>
<img alt='' border='0'
expr:src='data:link.target' height='100'
style='display:inline; margin:0px auto 10px; ;cursor:pointer;'
width='100'/>
</a>

Feel free to change this portion of code to anything you like. Just make sure the src and href parameters must be written as expr:src and expr:href respectively. This is an undocumented coding element, but I think that's the way the Beta's interpreter knows that it is an expression (to evaluate.)


Hope you will enjoy this new hack. Please give me your feedback.
[Thanks Hoctro.]
[Read the rest of this entry...]

Add Background Images to Adsense Ads-Blogger Hack

Wanna add background image to yourr adsense ad so that it looks better..
Ok then here is the trick..

<table align="center" width="your_image_width" height="your_image_height" border="0" background="your_image_path">
<tr><td width="your_image_width" height="your_image_height">
<div align="center">
Put_Google_Ads_code_here
</div></td></tr>
</table>


Edit the above code properly as below..

Replace Put_Google_Ads_code_here with your adsense code.
Replace your_image_width with the width of your image
Replace your_image_height with the height of your image
Replace your_image_path with your image file's url

After editing put this code in the place you need your ads to appear(with background image)

When you choose the background colour and border colour in Adsense for content setup please try to use colours matching with your back ground image..
[Read the rest of this entry...]

How to Add 3 Columns to Footer Section-Blogger Hack

Adding extra columns to your footer section will provide more valuable space for blog widgets, and also contribute a modern "Web 2.0" appeal for your blog design.

There are only four main steps to this tutorial, and I'm sure you'll agree that the overall process is quite simple. I have taken into account that different blogs have different widths and styles, and so have designed a fluid solution which should work in any Blogger layouts template.

Creating the new columns

Here are the four steps needed to transform the footer section of your blog template:

  1. Back up your existing blog template!

    Before making any modifications to your blog template, it is essential that you make a back up of your existing template. Then if you make any mistakes, or decide you don't like the new look, you can easily revert back to this design.

    To back up your existing template, go to Template>Edit HTML in your Blogger dashboard, and click on the "Download Full Template" link near the top of the page. You can then save your existing XML template file to your computer.
  2. Move all existing widgets from the existing footer section

    In the Layouts section of your Blogger dashboard, move all widgets which are present in your footer section into your sidebar (or other section) instead. This is only temporary, as you can move them back later once we have finished adding your new footer section. Most importantly, this ensures that you don't lose these widgets during the modification, and makes it much easier to complete.
  3. Add extra code to your footer section.

    Go to Template>Edit HTML in your Blogger dashboard, and do not check the "expand widget templates" box (this simplifies the process).

    Now you need to find this section in your template:
<div id='footer-wrapper'>
<b:section class='footer' id='footer'/>
</div>

Please note that this particular section may be called something slightly different in your template, eg: "footer-wrap" or "footer". In the case of Rounders templates, you may notice that there are in fact two DIV sections around the footer section. In any case, all we need to change is the line highlighted in GREEN.

Replace the entire line highlighted in GREEN with the code below:

<div id='footer-column-container'>

<div id='footer2' style='width: 30%; float: left; margin:0; text-align: left;'>

<b:section class='footer-column' id='col1' preferred='yes' style='float:left;'/>
</div>

<div id='footer3' style='width: 40%; float: left; margin:0; text-align: left;'>
<b:section class='footer-column' id='col2' preferred='yes' style='float:left;'/>
</div>

<div id='footer4' style='width: 30%; float: right; margin:0; text-align: left;'>

<b:section class='footer-column' id='col3' preferred='yes' style='float:right;'/>
</div>

<div style='clear:both;'/>
<p>
<hr align='center' color='#5d5d54' width='90%'/></p>
<div id='footer-bottom' style='text-align: center; padding: 10px; text-transform: lowercase;'>

<b:section class='footer' id='col-bottom' preferred='yes'>
<b:widget id='Text2' locked='false' title='' type='Text'/>
</b:section>

</div>
<div style='clear:both;'/>

</div>

  1. is a good idea to save your template at this stage, before we add just one small section of code to style the new footer section and ensure that the widgets don't get pushed beneath each other when you add them later.
  2. Adding style for the new footer section

    Once again, open the Edit HTML section in your Blogger dashboard. This time, you need to find the closing "</b:skin>" tag, which is where the style section of your template ends.

    Immediately before this line, add the following lines of code:

#footer-column-container {
clear:both;
}

.footer-column {
padding: 10px;
}
And save your template again. The style in these lines of code ensure that the footer column don't get too bunched up, or slide beneath each other in the layout of your template.

Now you have finished adding these new sections to your footer, go to the Layout section of your Blogger dashboard (Template>Layout), and you will see the three new column, plus a lower section which spans the width of all three column, to which you can now add new widgets!

I added a horizontal line to the footer section to ensure that there is a clear distinction between content in the footer columns and content in the wider section beneath. If you would like to change the color of this line, you can do so by replacing the hex color values in the line below (highlighted in red) with a different color:

<hr align='center' color='#5d5d54' width='90%'/>

If you are unsure of the hex value for the color you prefer, you can refer to the Color Calculator in the tools section of this site.

If you would prefer to remove the line altogether, simply delete the whole line.

I hope this tutorial enables you to customize your footer section with ease, so you can add more widgets and content to this area of your blog template.

For Future Updates,Please Subscribe!


[Read the rest of this entry...]

How to Add a Signature to Your Blogger Posts-Blogger Hack

If u Want to Pretty Up Your Post,There Are many Things,But to Add Signiture to your Blogger Post is Much Fun.Well,Below i am Showing a Tutorial How to Add a Signature to Your Blogger Post!

You must first have a signature that you want to have at the bottom of your post. This signature will be in the form of an image. To get that image, you can look online for sites that help create signagtures, or you can make your own using GIMP as I did. If you need help making a signature, read some of my posts on design and graphics. After you have your signature, upload it to your web host...I use Ripway.

Open your Dashboard/ Settings/ Formatting/ Post Template. Put this code in the Post Template box:

<p><image class="centered"alt="post signature" src="SIGNATURE URL" /></p>

Replace SIGNATURE URL With The Image URL!
Enjoy!!
[Read the rest of this entry...]

Super Peek-A-Boo Posts-Blogger Hack

In This Hack you can expand Posts from summary to full post, collapse them, and if you don't have a post summary in a particular post, the "Read More..." and "Collapse" links will not show up in your post.

This is how to implement it.

Step 0:
Back-up your template before modifying it.

Step 1:
Add the following javascript code to the head of your template. You can place it just above the </head>-tag.

<script type='text/javascript' src='http://www.anniyalogam.com/widgets/hackosphere.js' />


Step 2:

Find the includable named 'post' in your template, and change it so that it is exactly as shown below (the code in red has to be added):

<b:includable id='post' var='post'>
<div class='post'>
<a expr:name='data:post.id'/>
<b:if cond='data:post.title'>
<h3 class='post-title'>
<b:if cond='data:post.url'>
<a expr:href='data:post.url'><data:post.title/></a>
<b:else/>
<data:post.title/>
</b:if>
</h3>
</b:if>
<div class='post-header-line-1'/>

<div class='post-body' expr:id='"post-" + data:post.id'>
<b:if cond='data:blog.pageType == "item"'>
<p><data:post.body/></p>
<b:else/>
<style>#fullpost {display:none;}</style>
<p><data:post.body/></p>
<span id='showlink'>
<p><a expr:onclick='"javascript:showFull(\"post-" + data:post.id + "\");"' href='javascript:void(0);'>Read More...</a></p>
</span>
<span id='hidelink' style='display:none'>
<p><a expr:onclick='"javascript:hideFull(\"post-" + data:post.id + "\");"' href='javascript:void(0);'>Summary only...</a></p>
</span>
<script type='text/javascript'>checkFull("post-" + "<data:post.id/>")</script>
</b:if>
<div style='clear: both;'/> <!-- clear for photos floats -->
</div>
</div>
.... rest of template code ....

Save your template.

Step 3:
In the Settings - Formatting tab go to the bottom and enter the following post-template:

Type your summary here.
<span id="fullpost">
Type the rest of your post here.
</span>


Now every new post you start will have a fullpost-span by default. If your post is short, you can delete the <span>-tags from the post. The post will be displayed in full, and no links with "Read more..." or "Summary only" will be displayed for that post.

How it works (skip this if you don't like tech stuff).
The changes you made to the code make that every post-body consists of at least 3 span's: the fullpost-span that you entered in the post-template, a span for the 'Read more'-link, and a span for the 'Summary only'-link. Because there might be other spans in your post, each of these 3 spans have a unique id ('fullpost', 'showlink' and 'hidelink' respectively).
When you open your blog on the main page, the post is displayed as follows:


* Summary is displayed (always)

* Full text is hidden (first div, set to display:none)

* Read more is shown (second div)

* Summary only is hidden (third div, set to display:none)


The post is given a unique id, and this id is passed to the javascript-functions showFull and hideFull respectively. These functions use the getElementsByTagName-methods to obtain handles to the spans, and then toggle the way they are displayed.
A third function, checkFull, checks if the Fullpost-span exists. If not, both links are hidden.
[Read the rest of this entry...]

How to Add a Tooltip to Your Label links in Blogger

Another polish-and-shine hack: add a tooltip to the labels-links. Hovering your mousepointer over the link in your posts footer will show a tooltip saying "More posts on this topic".

Insert the red code into your template.

<span class='post-labels'>
<b:if cond='data:post.labels'>
<data:postLabelsLabel/>
<b:loop values='data:post.labels' var='label'>
<a expr:href='data:label.url' title='More posts on this topic' rel='tag'><data:label.name/></a><b:if cond='data:label.isLast != "true"'>,</b:if>
</b:loop>
</b:if>
</span>

Easy!!
[Read the rest of this entry...]

Post update Hack in Blogger-Blogger Hack

My Recent Posts Widget now and then leads to discussions with other Bloggers about the order in which recent posts appear. Updated posts appear at the top of the recent posts list, even if their publishdate is somewhere far in the past. From a technical point of view, this is quite logic: people subscribe to a feed to be informed about changes in the blog, so if an old post is updated, it should appear in the feed immediately. But many times changes are just cosmetic: correcting a typo, repairing a dead link, or assigning a new label. In that case, appearance of the post in the feed is a little bit annoying or confusing.

Some readers suggested that I should change the coding of the widget, and leave out updated posts. I think that is not a very good idea, because an updated post could contain relevant new information. So I came up with an interesting trick.

Add the following styling definition to your blog's template:


.updateinfo { display:none; }


Now, whenever you update a post, at the beginning of the post insert update-information, using the following html:
<span class="updateinfo">UPDATE:
Repaired some dead links. Content has not be changed.</span>


If you publish your post, the update info will not be displayed on your blogpage, but the feed, and therefor also the Recent Posts Widget, will show the update-text.
[Read the rest of this entry...]

How to Create Drop Down Menus in Blog-Blogger Hack

Blogger Beta provides an easy way to create link lists even for those who don't know HTML. But, there is no such functionality for drop-down menus. I had a few people ask me how to create drop-down menus and where to add them in the template. I thought this is something which can be simplified using a third-party widget. I have created an interface, similar to that of Beta, with which you can easily create drop-down menus and add them to your blog with one-click!

Just goto my Drop-down menu creator page and add your menu items one by one by providing a name and URL for each item. The updated menu will be shown to you. Once you are happy with the menu that you created, click the button to add it to your blog. You will see a page (like the one shown below) where you can select the blog (if you have more than one), provide a title for your menu and then click "Add Widget". You will see the widget getting added to your sidebar which you can move around to wherever you want. All this can be done without touching the template code!


[Read the rest of this entry...]

How to Show Table of Contents in Blog-Blogger Hack

A little while ago I thought it would be nice to have a Table of Contents on my Blog. So I experimented a bit on how this could be done without a lot of hacking, and also without outside help such as del.icio.us.

Ramani has some interesting hacks, and 2 of them I combined into a new one.

If you want to list all your posts in one page, you can use the following url:
http://yourblog/search/label/?max-results=100
Is it as simple as that?
Yes it is!
The max-results is limited to 100 results. This is a Blogger server-side restriction. So it will give a TOC for only the 100 latest posts.

If we want to display only post titles we have to do a little more hacking, but Ramani has explained how to do this on archive pages. I just applied this to label pages.

Edit your template, find the Blog widget, and replace the entire main-includable with this txt-file. Save your template.

Add the url to a convenient place in your menubar or sidebar, and ready you are.
[Read the rest of this entry...]

How to Display A list of all posts in your Blog-Blogger Hack

One of my visitor Hitesh Kulkarni sent a letter to me.
Here is the letter

Hi

I always wanted a list in my blog of the titles of all my post. Recently, I saw one in your blog. Can you please reveal, how do you do that? Is it that you just type in the links or you have done some of the coding work .Also I wanted to know that you are using old or the new blogger? Will the list function work in all blogging platforms?

Sincerely
Hitesh

Hello Hitesh, you forgot to mention your blog’s URL. This blog is using the new blogger XML template. To type in the links for blog posts was a very lengthy process, also it needed to be updated every time you post.But the method I use is very simple and works within seconds.Which ever blogging platform you are using, this method should work. All you require is a feed of your blog. Blogger has an inbuilt feed option for you. Your RSS feed URL should be http://www.yourblog.blogspot.com/rss.xml .Now you need to convert this into a simple javascript coding. You can get one converted here. Fill in all the details you want.

After you had that converted, Go to Dashboard > Layout > Page Elements > Add a Page Element > HTML / Javascript. Paste the javascript code you obtained in it. Click on save . Now give your blog a look . It worked !

This method can also be used for displaying recent posts list after posts or in the sidebar.
For this, you have to change the number of post titles to be displayed.
To add a recent posts list after each post , you need to parse the Javascript code. It can be done here. Then paste the parsed javascript in your XML template in this line “post footer line 2” paste it there and see the results.

Note:: This will only give recent posts and not the previous posts.
[Read the rest of this entry...]

How to Add a Menu Bar To your Blog-Blogger Hack

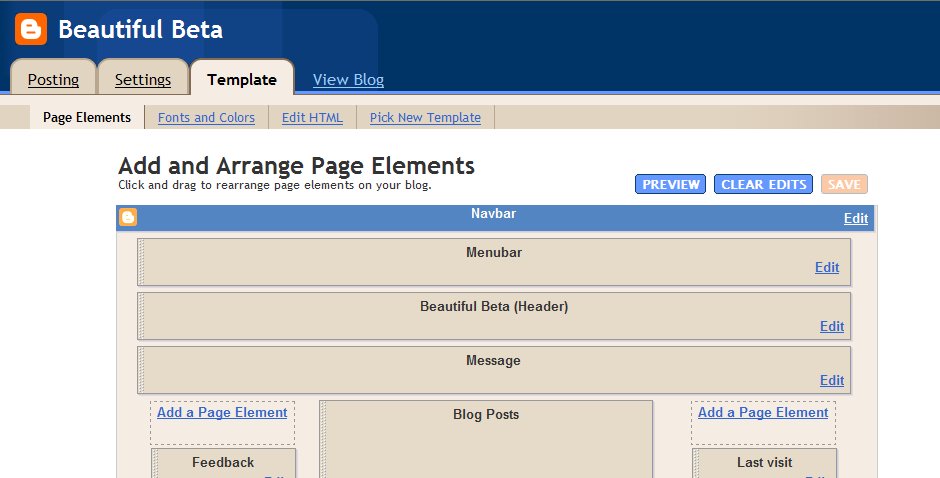
Missing a real menubar on you Blog? This hack explains how you can add a simple menubar to the top of your Blog. It is in fact a simple link list, and that is a standard page element of Blogger Beta. I have added a new section at the top of the Blog Page, and the link list is inside that section. Of course there are some tricks to play, such as hiding the link list title, and showing the links list elements side by side. Here is how it is done.


In this Page Layout you can see where I have added the Menubar. The code of this section is highlighted in red:
<div id='header-wrapper'>
<b:section class='menubar' id='menubar' maxwidgets='1' showaddelement='yes'>
<b:widget id='LinkList2' locked='true' title='Menubar' type='LinkList'/>
</b:section>
<b:section class='header' id='header' maxwidgets='1' showaddelement='no'>
<b:widget id='Header1' locked='false' title='Beautiful Beta (Header)' type='Header'/>
</b:section>
</div>

To the CSS-part of your template, add coding for the menubar-id:

#menubar h2 {display:none;}

#menubar ul {
list-style: none;
}
#menubar li {
float: left;
}

#menubar a:link, #menubar a:visited, #menubar a:hover {
padding: 5px;
display: block;
color: $headerTextColor;
}

#menubar a:hover {
background-color: $headerCornersColor;
}
The menubar title is hidden, so that only the options are visible.
The list-elements are set to none, so that there are no bullets in front of the menu options. And if a menu-option is hovered over, it is highlighted.


[Read the rest of this entry...]
 
AWN-Blogportant Template by FreeTemplate